What you know about apparel printing can save you—and your client—time, money and frustration.
When it comes to decorating apparel, numerous options are available today, and the accessibility of newer processes is continuing to grow. Some styles work well for large-run orders, while others work well for smaller quantities. Getting a full-color, personalized image printed on a shirt today is a lot easier and less expensive than in the past. But with all the different types of applications to choose from, how do you know which process is the right one to get your client’s desired result? And once you decide on the process, what should you be aware of to take your client’s project from artwork to production properly and get the best decoration possible?
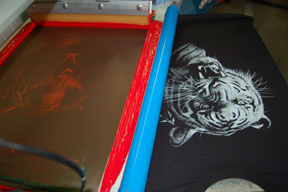
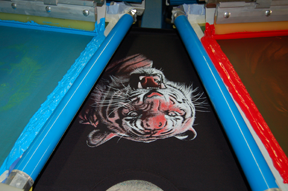
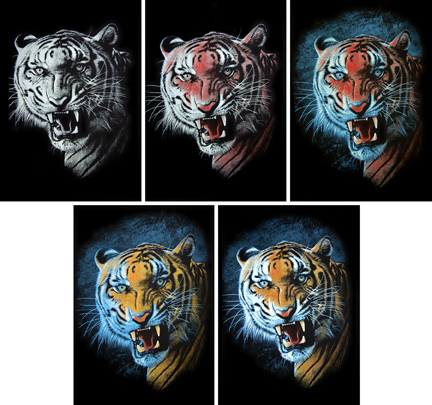 Screen printing One of the oldest decorating processes, screen printing can cost more on the front end because of the preparation involved. In screen printing, an image is reproduced by separating the design into a series of individual colors. The number of colors affects the printing cost because each color needs to be “exposed” onto a screen, and then each screen needs to be set up on a press and aligned so that all the colors register properly. If your shirt quantity is small and you want to print a three- or four-color design, this method is not as cost effective as some of the other processes. However, as your quantity increases, the setup costs become less of a hindrance, because once it’s set up you can print as many shirts as needed.
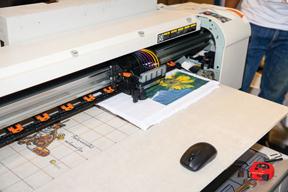 Digital printing. Many types of decorating processes use digital printing as their basis. The market for the digital printing process is growing and can be cost effective for smaller runs because it provides the ability to produce a full-color image without the initial set-up cost found with screen printing. Digital printing also makes creating more custom, personalized designs easier. You can create a file with one person’s name or photo, and then use the same file and add a different name or photo. Then, you simply print the different files. To create the same job with screen printing, separations must be created for each image, as well as new screens for each color affected by the change.
Direct-to-Garment: Also called DTG printing, this is exactly what it says—printing directly on the garment. The process is similar to the way a piece of paper is printed through an inkjet printer. In DTG printing, the garment is laid on a pallet and the pallet is then fed into the printer, where the inks are sprayed directly onto the garment to reproduce an image. It does require an additional pretreating step for dark garments.
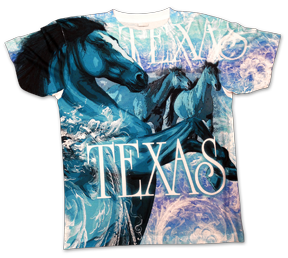 Dye Sublimation: This is a digital printing process where special sublimation paper is run through a dye-sublimation inkjet printer. The paper is then placed on top of the substrate (a shirt, for example) and then pressed onto it using a heat press. The heat from the press converts the ink into a gas that injects itself into the fibers of the shirt as opposed to laying on top of the fabric. Dye sublimation is ideal for creating shirts with oversized images or full-coverage prints, but it only works on white or light-colored polyester garments.
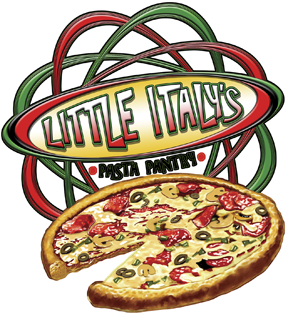 Print-cut Decorating: Print-cut decoration uses heat pressing like dye sublimation as well as digital printing. Instead of printing the image on paper, it is printed on vinyl material made specifically for garments and then cut away, either on the same machine or on a separate cutter. The excess vinyl material is “weeded” away, leaving only the image area. The image is then pressed onto a shirt with a heat press.
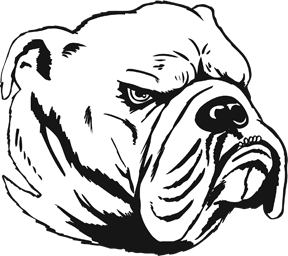
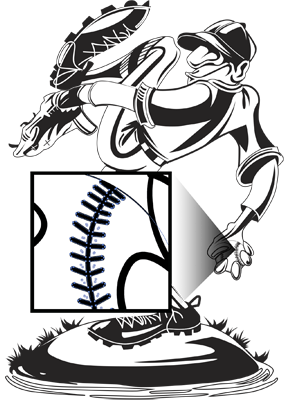
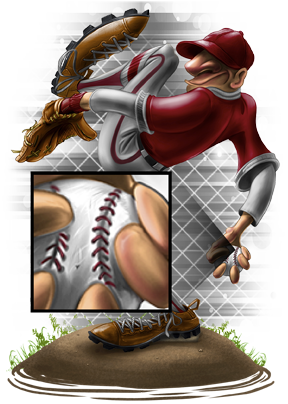
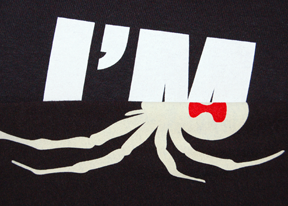
Cut-vinyl Decorating: This decorating process is different from the rest in that there is no printing involved. With cut-vinyl decorating, a vector image is run through a machine that cuts the outline of the design onto any one of a variety of vinyl materials, such as standard colors, neon, glow-in-the-dark and glitter. As with print-cut, the excess material is weeded and removed, leaving only the image, which is pressed onto the shirt. With cut-vinyl designs, decorators must consider the line thickness and spacing of images. For example, standard clip art usually is too detailed, and the lines and spaces are too thin to cut and weed efficiently, so the artwork may need to be tweaked to make it work. See examples below:
Heat Transfer: Heat transfer designs can be made by various processes. They can be screen printed and even printed on special paper that is run through an inkjet or laserprinter. Transfers are then adhered to the garment using a heat press.
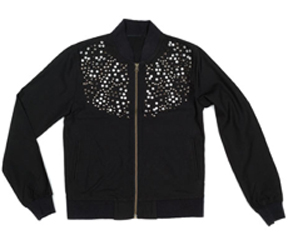 Embroidery and Rhinestones: Two other special types of garment decorating processes are embroidery and rhinestones, both of which are popular in the commercial andhome markets through the use of stock designs. However, custom layouts can be created by embroiderers and rhinestone artists who have the capabilities to manually create custom, digitized files from submitted art. In this process, an embroiderer can take the provided art file or redraw the provided image and assign the proper stitches to recreate the design. The file can then be read by the embroidery machine to sew out the image. A rhinestone image is created by interpreting the provided design as a series of circles. The file can then be used to create a template for the rhinestone layout which is then pressed onto the shirt, or it can be used by machines that apply the rhinestones to the garment.
Types of Artwork
Regardless of the decorating technique, it’s important to understand some of the specifics about artwork, fabric and color that can be helpful in creating your client’s design and selecting a garment to get the best possible results.
Promotional products artwork primarily uses two types: vector and raster. Vector artwork is created using a series of points or nodes and outlines or paths, to create shapes which can then be filled or outlined with color. Each shape can be selected and modified individually. This type of artwork can be enlarged without affecting the sharpness of the image. It will always retain its smooth, clean edge. This is the type of art you would probably be familiar with for promotional products such as pens or cups, which typically require a one- or two-color imprint. While a vector file is usually used for minimal color art, it can accommodate many colors including gradients and tints or shades of colors.
Raster artwork, on the other hand, is tonal artwork created by series of small dots or pixels. Photographs or painted illustrations would be examples of this type of art. Unlike vector images, individual shapes can’t be selected in raster art. Raster artwork loses its sharpness when enlarged, becoming increasingly blurry and pixelated. When creating this style of artwork it’s important to know the largest size needed to produce a product. Raster artwork that’s created at its actual size can be reduced if necessary for other applications. This type of artwork is becoming more popular with the growth of digital printing.
File Resolution
Another component to be aware of when setting up a raster design is the resolution. For a full-size t-shirt design, a resolution set at 300 dpi is ideal. When creating a design for screen printing, the general rule is to set the resolution at 1 ½ to two times the halftone screen that will be used to print the image. So, if the printer will be using a 45-lpi line screen, the image could be saved at a resolution of 90. However, it is not recommended to set a resolution below 150 dpi. For large format graphics, sometimes a lower resolution such as 150 or 200 dpi can be used. It’s always best to check with the printer to learn what sizing and resolution they require.
Vector Vs. Raster: Which To Use?
While vector artwork is an option for digital printing and screen printing, it is required for cut-vinyl decorating. The cutter reads the nodes and paths that are created in the vector file in order to know where to cut. A raster image that’s used for print-cut artwork will need to be saved and placed in a vector program such as Adobe Illustrator or Corel Draw in order to create the vector outline cut path.
Vector files are also used by embroiderers when digitizing a design to be sewn. The vector layout is created and then imported into digitizing software. The embroiderer then selects the shapes and applies the appropriate stitch.
Rhinestone templates are made using vector files. The templates are created by laying out appropriate-sized circles in the preferred design shape. The holes can then be cut out to create a template for the placement of the rhinestones.
Vector artwork isn’t normally recommended for digital processes because with large areas of solid color, if a print head gets clogged, streaking or banding can become more evident. On the other hand, vector artwork is a good choice for screen printing because it results in smooth coverage of large solid areas without streaking.
Raster artwork is perfect for all types of digital printing as well as screen printing. However, creating separations for a raster design is much more involved and requires more colors and screens, so it can be more costly. For digital printing, the nature of the full-color raster image helps camouflage any streaking that may occur if a print head becomes clogged.
File Formats
Regardless of whether you create a raster or a vector image, there are numerous file formats out there, and each process and even production device requires its own specific file format in order to produce the job correctly. Vector file formats include ai (Adobe Illustrator), cdr (CorelDraw), pdf (Portable Document Format), and eps (Encapsulated Postscript). While ai and cdr files are native to those programs, ai files are recognized industry-wide and can be recognized by other software and production equipment.
Both eps and pdf formatted files can be saved out of vector and raster programs. When saved out of a vector program such as Illustrator or Corel Draw, the file will retain its vector characteristics. However, if it is saved out of a program like Photoshop, it will be saved as a raster image.
The following file types can all be used to save raster artwork: psd (Photoshop), jpg (Joint Photographic Experts Group), tif (Tagged Image File Format), and png (Portable Network Graphics). They can all be saved out of both vector and raster software programs, but will always be saved as a raster image regardless of what type of program it was saved from. For example, if a black-line vector image is created in Illustrator and exported as one of these file formats, it will lose its vector characteristics and become a raster image, even though it looks like a vector image; individual shapes within the image can no longer be selected.
The jpg format has been around for a long time, used primarily by digital cameras because of its small file size. However, this particular file is a “lossy” compression format, meaning that each time it is opened and closed it loses some quality. For this reason, a jpg is not recommended as your final file format when saving art. Also, a jpg is a common format used by the web. Too often people will pull a logo or an image from a website and think they can just use it as is. These web images are usually low-res jpg files with a 72-dpi resolution, making them useless for printing. Almost always the artwork would have to be recreated either in vector or raster format using the jpg as reference only.
Zip files are compressed versions of multiple files that can be transported via email or through downloads. A single zipped file can be sent to a printer, for instance, who can then “unzip,” or decompress, the file and gain access to all the individual files.
One final format to consider is DCS 2.0 (Desktop Color Separation), an eps-based format used by screen printers. When an image is separated into its individual colors for printing, it can be saved as a single file with all the separations together. This file is then placed in a vector program so the screen printer can print the individual spot color separations.
When creating artwork, always check with the printer to see which file format they accept for a particular decoration process and for the production equipment they will be using.
Ink Colors
Depending on the decorating process, it’s important to know how to approach the aspect of color in a design. Spot color refers to actual individual colors. If a screen-printed design is created using one to three colors, each color is considered a spot color. While screen-printed designs can be reproduced using other color methods, using spot colors is the most common. Even full-color designs, once they are separated, can be printed using specified spot colors.
When it comes to full-color images, RGB (red, green, blue) and CMYK (cyan, magenta, yellow and black) are the most common color modes used. RGB uses a wider spectrum of color while CMYK, also known as process color, uses a narrower spectrum. While digital printers use CMYK inks or CMYK plus additional ink colors to reproduce full color images, most require an RGB image to print. When a design is printed, the printer will interpret the RGB information and then print it out using the CMYK inks. It’s always best to see which mode your printer requires to produce a design. Working in RGB mode before saving a final file in CMYK can be done, but some colors may be lost in the transition; therefore, adjustments may be needed to boost color for the final image.
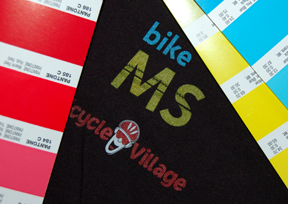
If a specific color match is needed, Pantone® colors can be specified. While there are many color systems available, Pantone is an internationally-recognized system used by printers and designers. Be aware that choosing a Pantone color that is not one of the standard colors and needs to be mixed may result in an additional fee. When it comes to full-color digital printing, it can be a little more difficult to achieve a specific color using CMYK inks. However, by at least giving a Pantone color as a reference point, the printer will have something to attempt to match.
Choosing The Right Process For The Right Fabric
The type of decoration process you use depends on the type of garment. For example, dye sublimation requires a garment with some kind of polyester content. When heated with the press, the inks that are printed on dye-sub paper go from a solid to a gas—i.e. they sublimate—which is infused into the polyester content to reproduce the image. This infusion cannot happen with cotton.The more polyester your shirt contains, the more color is infused and the richer and brighter the image will be. The best fabric choice for the dye-sublimation process is 100-percent polyester.
When it comes to cotton fabrics, there are all types of weights, weaves and other options that affect the feel of the shirt. These different characteristics also affect how smooth a shirt is to the touch. Fibrillation occurs when the fibers of the garment do not lay flat and smooth but rather stick up, creating an uneven texture. This results in a print that is not smooth, and fibrillation can also affect the evenness of the color. (Images 10 & 11) Fibrillation can occur in screen printing and direct-to-garment printing. Using a heat press to flatten your garment before direct-to-garment printing can help smooth out the fibers. Printing a good underbase will help smooth the fibers for screen printing as well.
Because just about all of these processes use heat, whether it is a dryer for screen print or a heat press to apply a graphic, pay particular attention to polyester and other plastic-based components of fabrics. Some fabrics will not work for all processes and can be burned or scorched. Check with your printer to see which fabrics can or cannot be used with your decoration process.
Heat Transfer Vinyl
Stretchy athletic wear that is becoming increasingly popular is particularly sensitive to different processes. Special vinyl materials are made to adhere properly and stretch along with the fabric, unlike standard vinyl that does not stretch.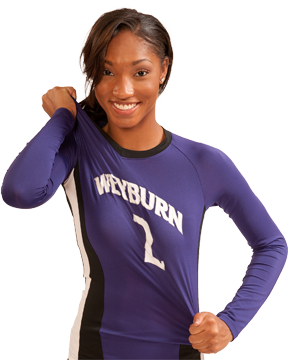
When choosing a garment, consider not only the fabric but the color of the garment itself. Since the paper is printed through an inkjet printer in the dye sublimation process, white ink is not printed. Therefore, you’ll want to use this process on a light-colored garment, preferably white, particularly if your image contains a lot of white. Otherwise, the shirt color will show through the image and affect the design.
Dye Migration
Colored shirts can be decorated by screen printing and direct-to-garment printing because they allow for white inks to be printed. However, decorating a colored garment has its own issues and requirements, too. One problem to consider with coloredpolyester or cotton/poly-blend shirts is dye migration. This is when the dyes of the polyester fibers transfer through and tint the ink above. (See images below). It’s particularly common with red garments, as the red dye in the garment can be so strong that it will turn white areas in a garment pink. Consider this when working with your client to create artwork, and keep white areas in the design small.
Another consideration when printing on colored shirts is that they also require an underbase, a layer of white ink printed first so the remaining colors printed on top will be true to the actual image. If an under base is not printed, the color of the shirt will interfere with the image and it will not reproduce properly. Always keep this in mind when screen printing on a colored shirt, as the white will count as an additional color even if your artwork does not have white showing in the image area.
Other Pre-Treatments
When doing direct-to-garment printing on a colored shirt that requires a base white, a pre-treatment is also required before printing. For this, a special liquid solution is appliedto the garment and then heat pressed to dry. It allows the white base to adhere and the colors to lie on top. Colored shirts decorated on a DTG printer will cost slightly more, not just because of the shirt color but because of the added process.
With the many different garment decorating processes available today, it can become quite confusing for a distributor. However, with some general information on what each process requires, you’ll know what questions to ask of either your printer or supplier to get your order set up properly and efficiently, to save time and money, and get the best-looking promotional garment in the end.
Dane Clement is president of Great Dane Graphics, a GroupeSTAHL company that offers royalty-free stock artwork specifically designed to be used with all types of apparel decorating. Clement, who has 30-plus years of experience in computer graphics and color separations, is a regular speaker and judge at industry trade shows. He authored T-Shirt Artwork Simplified, a training book for both Adobe and Corel users. For more information, email Dane at dane@greatdanegraphics.com or visit greatdanegraphics.com.
Decorating Terms: A Quick Primer
Cut-Vinyl: A garment decorating technique that uses a vector file and a cutter to cut the image out of vinyl, which is weeded and then applied to a garment using a heat press.
Digital Printing: The process of printing using a digital print head.
Direct-to-Garment Printing: Also known as DTG printing, the process of digitally printing an image on a t-shirt or substrate using an inkjet printer.
Dye Migration: The transfer of dye from the polyester fibers of a garment through the overlaying ink, causing the decoration to change color.
Dye Sublimation: A printing process using heat to evaporate pigments from a transfer print and embedding them into a polyester-based media such as performance-wear garments and coated products such as mugs, key chains, etc.
Fibrillation: The uneven texture or color that occurs when fibers from a garment do not lay smooth and stick upthrough the printed ink.
Pantone®: The most common color matching system used internationally by printers and designers to reference specific colors.
Print-Cut: A garment decorating technique that uses digital printing on vinyl which is cut by the same printer or moved to a separate cutter. Vinyl is then weeded and applied to the garment using a heat press.
Raster Artwork: Continuous tonal artwork that is created by small dots or pixels, such as a photograph.
Screen Printing: The process of printing images on a t-shirt or other substrate using screen, mesh and ink. The image is transferred by the pushing or pulling of a squeegee.
Spot Color: A specific or single color applied to an individual element in an image. This is the most popular screen printing technique.
Underbase: The initial color, usually white, is printed on a colored substrate in order to provide a light-colored base for additional colors to be printed on top. This allows the additional colors to be truer.
Vector Artwork: Artwork that is defined by mathematical relationships of lines and shapes. Vector files are resolution independent, which means they can be scaled to any size without losing detail or clarity.
